Pages

Showing posts with label foodie. Show all posts

Tuesday, March 3, 2015

Oatmeal Chocolate Chip Muffins with Strawberry Butter


This morning, I made a choice between hiking through half a mile of snow or paying almost $2 to ride a bus. This afternoon, I had to make the same decision again. In fact, because my town doesn't salt or plow some of the sidewalks I use, I'll have to make this choice each and every day until the snow melts.


However, in some places, the weather in early March is a little bit more desirable, and luckily there are some ways to enjoy the perks of those warmer climates even if you find yourself under Punxatawny Phil's curse for a few more weeks.


The trick? Strawberries. Right now, in Florida, it's strawberry season. That means east coasters can get the juicy, red fruits shipped from down south instead of out west. For those of us in the mid-Atlantic, this means fresher, sweeter, and cheaper berries than we could get earlier in the winter. 


Next time you're in your grocery store, look for strawberry labels from Plant City, FL. These berries may be a little smaller than the California variety, but trust me, they are so worth it. Rinse them and eat them for breakfast. Put some in your cereal or a spinach salad. Or, blend them up into a sweet strawberry butter, perfect for these oatmeal chocolate chip muffins.


Plant City strawberries are basically all the best parts of the weird Florida seasons, without having to actually move there and deal with summer.


Oatmeal Chocolate Chip Muffins

1 1/4 c Quick oats
1 c Whole wheat flour
1 tsp Salt
1 Egg
1 1/4 c Milk
1/2 c Vegetable oil
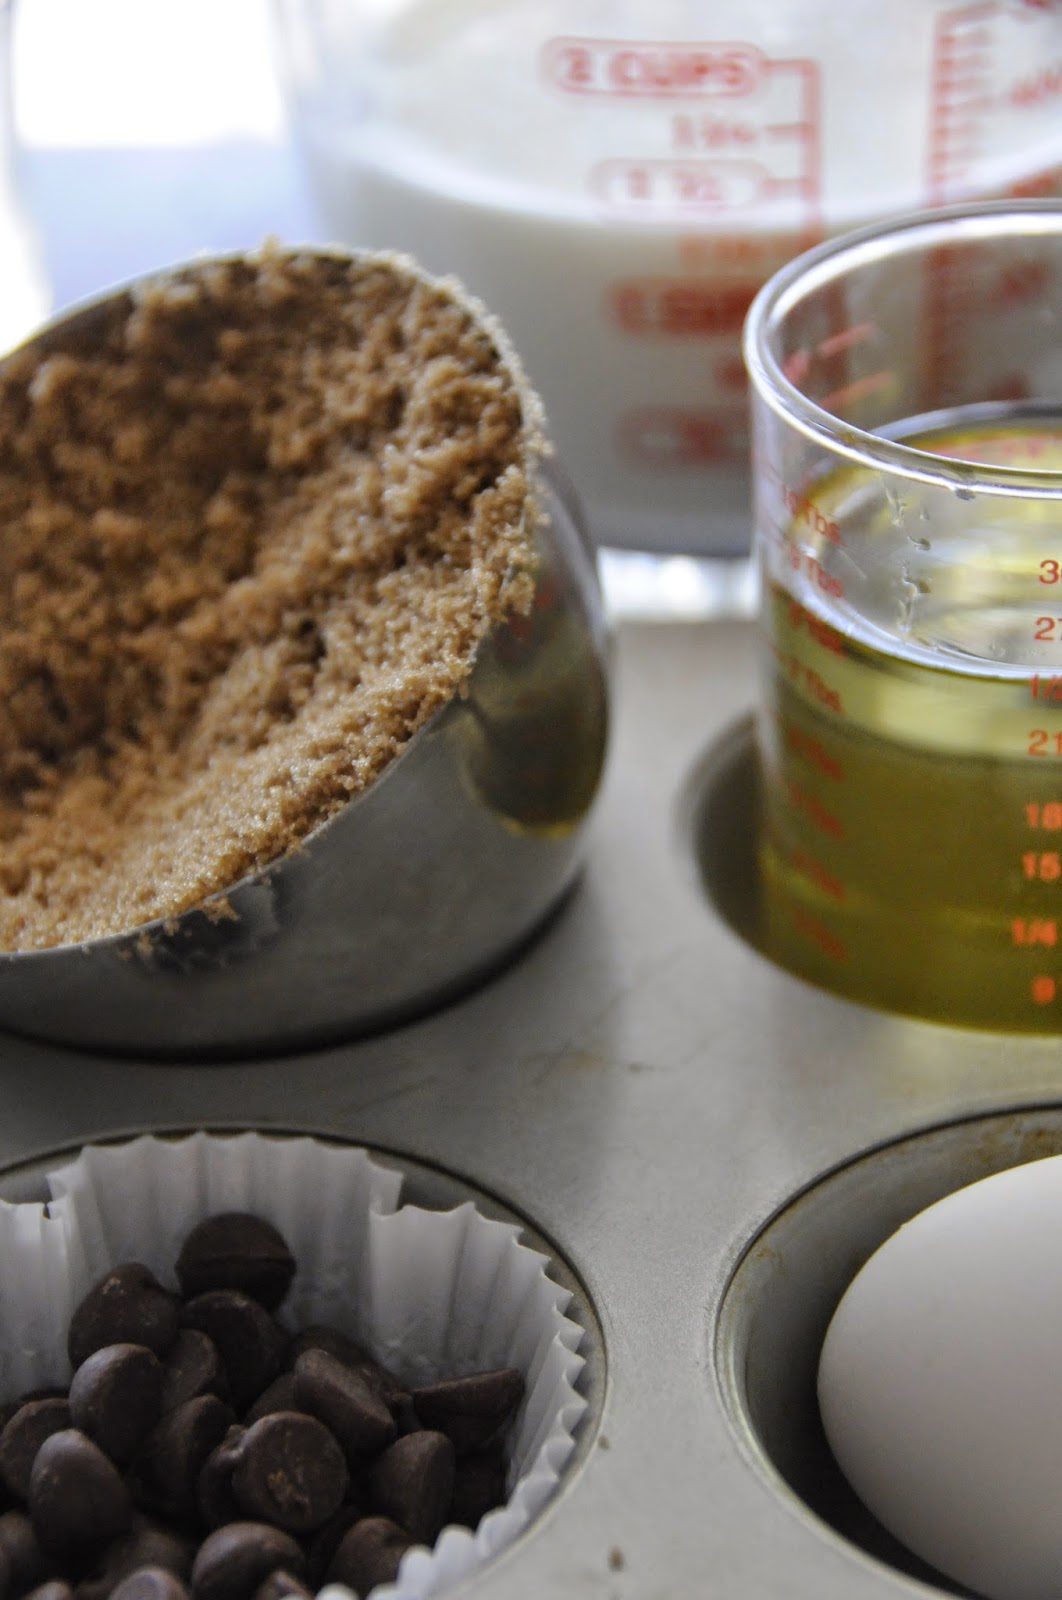
3/4 c Brown sugar, packed
2 tsp Baking soda
2 tsp Cornstarch
3/4 c Chocolate chips

1. In a medium bowl, combine the oats, flour, baking soda, cornstarch and salt, and mix thoroughly.
2. In a large bowl, combine sugar, oil, milk, and egg. Once mixed well, gradually stir in the dry ingredients.
3. Stir until just mixed, and then let sit for about 10 minutes.
4. Fold in the chocolate chips and separate into a greased or lined muffin pan.
5. Bake at 400 F for 20-25 minutes or until a toothpick comes out clean.
6. Remove from pan and cool on a rack. Serve with strawberry butter.

Strawberry Butter

1/2 c Butter, unsalted, softened (one stick)
3/4 c (about 5-6) Strawberries, chopped
2 Tbsp Powdered sugar
1/4 tsp Salt
Splash of heavy cream

1. In a small bowl, place the chopped strawberries and the sugar. Mash the berries and mix using a fork, pastry blender, or potato masher.
2. Add the butter to a large bowl with a splash of cream and the salt. Mix using an electric mixer on medium.
3. Add the strawberry mixture and continue mixing until fully incorporated.
4. Transfer to a small bowl or ramekin and chill in the fridge until ready to use. Or freeze for longer storage


Monday, February 16, 2015

Raspberry Drinking Chocolate For One


You're invited to come over for breakfast anytime you want. But you should know that I'm not usually fully dressed and that I'm probably only half coherent until after I've put some caffeine into my system. Don't worry though, I've been told morning is when I'm at my wittiest. It's also when I wake to cook and bake the most delicious and decadent treats. Breakfast isn't healthy and it has no place trying. Butter. Cream. Sugar. Flour. Those are the ingredients I want in my breakfast foods.


Chocolate can come too. I still eat Eggo waffles with chocolate chips. I delicately place one chip into each hole in the waffle after it's toasted, then microwave the whole treat for 15 seconds. The chips glisten but they don't lose their shape. Stunning. A squirt of whipped cream tops it off. I fold the whole thing in half and eat it like a waffle taco.


If you do come visit, I won't want to share my coffee, but I might make you homemade hot chocolate if you ask nicely or offer to take the dog for a walk later. I'm not talking about the powdered stuff (although, that stuff's pretty good if you mix it into warm milk instead of water). I'm talking rich, creamy, indulgent. Semi-sweet chocolate chips. Cocoa powder. Heavy cream. Raspberries.


Oh that is the stuff.

It's heavy and sweet and bitter and sour. This isn't the hot chocolate you chug down. This is the one you cradle with both hands and breathe out of. This is the one you sip slowly and close your eyes, thinking about winterscapes and fuzzy scarves and fireplaces.


Didn't have a date over the weekend? It's okay. This raspberry hot chocolate can be your Valentine. I want to wake up to this every single day. Sorry coffee, we may have to reevaluate our relationship.


Raspberry Hot Chocolate for One
Makes 1 serving, doubles easily

Ingredients:

1/2 cup Frozen raspberries
2 tsp Sugar
3/4 cup Milk
1/4 cup + 2 Tbsp Heavy cream
1/4 cup Semi-sweet chocolate chips or chopped chocolate
1/2 Tbsp cocoa powder
Sugar to taste

Instructions:

1. In a small saucepan, heat up the raspberries and one teaspoon of sugar until all the ice crystals have melted and the berries start to get soft.
2. Once you're able, crush the berries with a wooden spoon and stir into a syrup. Add the other teaspoon of sugar and stir until dissolved. Remove from heat, and cool until just warm to the touch.
3. Once cooled a bit, pour the raspberry syrup through a fine mesh strainer into a small dish, pressing down to get as much juice as possible without pushing any seeds through. Set aside for later.
4. In a medium saucepan, heat the milk and cream to a simmer. Don't let them boil! As soon as it starts bubbling around the edges, remove the pan from the heat.
5. Place the chocolate chips in a small bowl. Slowly spoon the hot milk over them and stir. Keep adding little bits of milk and stirring until the chips melt completely.
6. Add the melted chocolate and the raspberry syrup to the rest of the hot milk in the saucepan. Stir until everything is incorporated.
7. Place over medium-low heat, and add the cocoa powder. Stir until dissolved. Add sugar to taste (I didn't add any, but I like bitter, dark chocolate).
8. Pour into an 8oz mug, and top with fresh whipped cream and any last drippings of the raspberry syrup. Drink immediately for breakfast or dessert!

Friday, February 6, 2015

Super Bowl Bacon Wrapped Water Chestnuts


I swear, I grew up thinking that bacon wrapped water chestnuts were a secret family recipe. We made them for any and every event, party, and potluck. And each time, they'd disappear, and magically transform into a pile of toothpicks. Seriously, if you can name a holiday that involves gathering, we probably made bacon wrapped water chestnuts.


This year, I made them for the Super Bowl. I also made an intense plate of nachos. Nobody left hungry. This was my first time watching the super bowl for real. I watched it last year in a bar in Chicago, on a business trip with a coworker. If it wasn't for the good craft beer on tap, we would have retired early to our cozy hotel beds.

But this year, we did the whole big party in someone's living room thing. I wanted to host, but our friend did a fine job, and I still got to cook. Maybe next year. For the first time, I watched the game actually knowing something about how it works. Not only did I understand, but I actually explained the rules and concepts to a few people. I was pretty proud of myself.


I wasn't the biggest fan of the teams, but it was good that the game was so close, right until the last play. It kept me involved. The halftime show was entertaining and spectacular, and I loved the cameo from Missy Elliot - what a throwback! The commercials were weirdly depressing, but I loved the Invisible Mindy for Nationwide and Liam Neeson's Clash of Clans.

I even got a few compliments on my fancy water chestnuts! It turns out they weren't a secret recipe at all, just really easy to make. My mom's method includes wrapping the chestnuts right out of the can with precooked bacon and then microwaving the treat until the bacon is crispy. For me, though, it's about more than just the two main ingredients in this appetizer.


I can't help but take advantage of the water chestnuts' ability to absorb flavors and signature crunch, and bacon's time-tested combination of salt, sweet, and fat. These two are so versatile that the real fun comes in the flavors. I used three very different marinades, and then proceeded to mix them all up while baking, of course. That's okay though; I like the surprise!


Bacon-Wrapped Water Chestnuts

Ingredients:

2 cans Whole water chestnuts (about 45 individuals)
Strips of bacon (half a strip for each water chestnut)
Toothpicks (1 for each water chestnut)

Ginger Teriyaki
2 Tbsp Soy sauce
1/2 Tbsp Brown sugar
1/4 tsp Grated ginger
1/4 tsp Garlic powder
1/4 tsp Onion powder
1/8 tsp Cinnamon
1 Tbsp Rice vinegar
1 Tbsp Water
Sriracha to taste (optional)

Honey Mustard
1 Tbsp Honey
1/2 Tbsp Apple cider vinegar
2 tsp Ground mustard
1/4 tsp Garlic powder
1/4 tsp Onion powder
1/8 tsp White pepper
1/8 tsp Dill weed
2 Tbsp water

Maple Chipotle 
2 Tbsp Maple syrup
1/2 Tbps White vinegar
1/2 tsp Paprika
1/4 tsp Chipotle powder
1/4 tsp Cumin
1 Tbsp Water

Instructions:

1. Mix all the ingredients in a medium sized bowl for each marinade, except the water (and Sriracha for the teriyaki)
2. Once they start to be mixed well, add the water until you have a thin mixture. For the teriyaki, add a few squirts of the Sriracha to your taste
3. Separate water chestnuts into three equal groups, and place each group in its own plastic container with a lid (old cold cuts containers work well) in a single layer along the bottom
4. Cover each set of water chestnuts with its respective marinade, being sure to cover the tops and sides of all the water chestnuts
5. Close the containers and refrigerate overnight (or about 6 hours if you're making these for the same day)
6. Remove the containers from the fridge. Place parchment paper over a large cookie sheet.
7. Wrap each water chestnut in a half strip of bacon, and hold together with a toothpick. Place on the cookie sheet so they are not touching
8. Bake at 400 for about 15-25 minutes or until bacon is to your desired texture. I like mine a little crispier, so I tend to leave them in a bit longer.
9. Let rest about ten minutes and serve immediately. If traveling, place in a sealable container, toothpicks up, in multiple layers. Reheat on a paper towel lined plate in the microwave for about 30 seconds or until warm.


Monday, February 2, 2015

Multigrain Cocoa-Cinnamon Buns with Brown Butter Glaze


Did you hear there was a blizzard on the east coast last week? They named it and everything. Snow storms are kind of fun. They have this huge anticipatory period where you aren't sure what's going to happen. It's usually a lot of hype, but admit it. You like to get hyped up.


I like the cliffhanger feeling: Will it snow at all? It hasn't started yet.... I also like to track the storm using NOAA's satellite imagery, especially the infrared and water vapor loops. You can learn a lot about storms from watching these change as the storm progresses. I'm kind of a weather nerd -- I track hurricanes too. When I was a kid, I had this weather kit with a rain gauge and a barometer made from a balloon and a glass jar.


We didn't get much of a storm here. Living on the edge of the weather warning zone is funny. There were a couple of inches on the ground, but nothing crazy. Not like the lake effect snow we used to get when I lived up in Rochester. It's amusing to see how a couple inches can turn this town upside down, though. Everyone gets into a panic about school closings and traffic - and we were only in the 1-3" zone!


Winter and snow make me want to bake. I want to have my oven on all the time, for both the extra heat and the amazing smells. I want some dough rising on the back corner of my kitchen counter. I want to eat warm, gooey treats and soft, fluffy breads. Then, I want to hibernate.


Cinnamon buns are basically winter in food form. I grew up popping Pillsbury cans (which terrified me, by the way) and baking those eight glorious rolls in the toaster oven. But all the white flour and overly sweet sugary cinnamon just doesn't feel like a balanced breakfast anymore.


For this recipe, I played with some grains - oats and whole wheat. But don't run away. These are anything but health food. These are so ooey and gooey and sweet and spicy. I was tempted to eat the entire pan and then lick up the glaze. I didn't. I did, however, melt some of those hot cinnamon candies into my hot chocolate and call it breakfast. Yum.


Multigrain Cocoa-Cinnamon Buns with Brown Butter Glaze

Ingredients:

Multigrain Dough:
3/4 cup warm Milk (110F, heat in microwave for about 1 minute)
2 1/4 tsp Yeast (or one packet)
1 1/2 cups All purpose flour, plus 1/4 cup for kneading
3/4 cup Whole wheat flour
1/2 cup Quick oats
Salt
2 Tbsp Butter
1 Egg
3/4 cup Brown sugar
Canola/vegetable oil for greasing

Cocoa-Cinnamon Filling:
2 Tbsp Butter, melted
1 Tbsp Cocoa powder
1 Tbsp Cinnamon
1/3 cup Sugar

Brown Butter Glaze:
2 Tbsp Butter
2 tsp Whole milk
1/2 cup Confectioner's sugar
1/8 tsp Vanilla extract

Instructions:

1. Add the yeast to the warm milk and let sit for about 5 minutes, or until bubbly and foamy.
2. While waiting on the yeast, in a large bowl, mix the flours, oats, and salt. Once thoroughly mixed, add in the egg, brown sugar, butter, and yeast mixture. Stir until everything is incorporated and you have a soft, sticky dough.
3. Knead the dough for a few minutes on a floured surface. Then place into a greased bowl. Put a little oil on top of the dough and cover with plastic wrap. Place a clean kitchen towel over the bowl, and let sit in a warm, dry place until doubled in size, about an hour.
4. While waiting, you can make the filling: in a small bowl, whisk the cocoa, cinnamon, and sugar together.
5. Once the dough has risen, roll it out on a floured surface until it is about 12" x 18"
6. Melt the 2 Tbsp of butter for the filling, and spread evenly across the surface of the dough, leaving a 1/2 inch margin on one of the short sides. Then spread the cinnamon-cocoa sugar evenly across the buttery dough.
7. Starting at the short end without the margin, roll the dough like a jellyroll. Once completely rolled, seal the seam with wet fingers.
8. Mark your cuts, then cut into 9 rolls. Place them in a greased square baking pan. Cover, and let rise until they have double in size, about an hour.
9. Preheat the oven to 375F, and bake the rolls for 15-20 minutes.
10. While baking, prepare the glaze: Brown the butter by cooking over medium heat, stirring regularly, until it begins to smell nutty and you see little gold flecks along the bottom. Add in the  the milk, vanilla and sugar to create a thin glaze, keeping it on low heat until the buns are ready.
11. Remove the buns from the oven, and let cool about 10 minutes. Drizzle the glaze over top while they are still warm. Allow them to cool in the pan, and then transfer to a cooling rack or plate to serve.

Serve these immediately, while warm or store in the fridge in an air tight container for up to 2 days. Warm in the microwave for about 20-30 seconds before eating. My mom likes to unwrap and spread some softened butter onto the cinnamon side, but if you're impatient like me, just bite right into it!

Friday, January 30, 2015

Things I Loved This Week (And Last!)

Sneak peak: Next week's multigrain cocoa-cinnamon buns!
What I'm Reading

All Roads Lead to Home (Bellingwood Series): I started reading this book series, and I absolutely love the characters! But Diane Greenwood Muir doesn't let the plot suffer either. There is mystery and intrigue, and I am totally hooked! Here's a quick plot description to draw you in: "Polly Giller returns to small-town Iowa from Boston ready to start a new life. She is renovating an old school building and while getting to know new friends, two sets of bones fall out of the ceiling."

Around the Web


A backlit Belgian Trippel, follow me on Instagram for more!

#TheWriteParty: I joined my first Twitter chat this week and it was awesome! I met some fantastic writers, and learned some new points of view about the creative process. Are you a writer too? Join in Thursday at 7, hosted by TheWriteWoman


This article from Business Insider uses Richard Feynman as an example to show that having more mental models can make unsolvable problems solvable: "If you only have one framework for thinking about the world, then you'll try to fit every problem you face into that framework."

An extremely interesting story by Zachary McDermott, where he discusses his mental illness from a first person perspective: "I could tell the people on the sidewalk were actors, but just barely. They resembled the normal East Village lot, but they were archetypes"

Awesome Instagrams


Thursday, January 29, 2015

Apple Cider Vinegar Slaw


Winter is rough, right?


I get pretty terrible cabin fever. There are some moments where all I want to do is go walk around outside. Then I open the porch door or a window and remember that there is no way I'm going to spend quality time out there.


Summer's not close. We're almost as far from 4th of July barbecues as we can get, but that doesn't mean we can only cook comfy wintery food that makes us hibernate. We don't have to turn the oven on for every single snack or meal, even if it does warm up the apartment.


This cole slaw reminds me of summer, but it still has some warm, wintery flavors. The apple cider vinegar syrup is gooey and cozy, with a sharp aroma. The rosemary and dill weed wrap the mustard and parsley in a fuzzy fleece blanket.


This is winter coleslaw for your winter indoor picnic barbecue, which I am totally having. Pulled pork sandwiches, oven baked garlic parmesan fries, and this seasonally confused salad on the side.


Winter will be over soon, but then we'll be begging for sweater weather to return. In the meantime, indoor barbecue it is.


Apple Cider Vinegar Slaw
Serves 2, doubles easily
20 minutes work, 2-3 hour patience

Ingredients:

2 cups Green cabbage, sliced thin or shredded
1/4 cup Carrots, shredded
1/4 cup Apple cider vinegar
1/4 cup Sugar
2 Tbsp Olive oil
1/4 tsp Dried mustard powder
1/4 tsp Garlic powder
1/4 tsp Rosemary
1/4 tsp Dried parsley flakes
Pinch Dill weed
Salt and black pepper to taste

Instructions:

1. In a small saucepan, warm the apple cider vinegar over medium heat. Mix in the sugar until completely dissolved and you have a vinegary syrup
2. In a tiny bowl, mix together the spices except for the salt and pepper
3. Add the syrup to a small glass bowl and mix in the olive oil and spice blend, and whisk until everything is incorporated into a dressing
4. In a larger glass bowl, toss the cabbage and carrots; add in the dressing and toss until all the vegetables are coated.
5. Add salt and pepper to taste
6. Cover with plastic wrap and refrigerate for 2-3 hours, or until fully chilled
7. Toss again before serving. Add more salt and pepper if needed, and then serve with a slotted spoon

Monday, January 26, 2015

White Honey Milk Bread


Have you tried stress baking?

I have to highly recommend it, especially when you're unemployed and just having one of those days where the job hunt is not working at all in your favor. In college, I used to make cupcakes around finals. Not only did mixing the batter and frosting ease my mind, but I also got to eat cupcakes.


Today, I wanted something a little more cathartic than icing miniature cakes, though. So, it was time to bake some bread. A lot of people think making bread is hard, especially when you can buy a loaf for $1.50 in the grocery store, presliced and everything.

It's not hard. It's hard work, but it's not hard. Bread is a lot of waiting. Mix. Rise. Punch. Rise. Separate. Rise. Bake. Cool. Three of those steps involve actual doing, while the others are just waiting.


But the waiting is fantastic. Your whole house starts to smell like yeast, and that is just perfect. The smell of yeasty rising bread is never a bad thing.

I have three favorite parts of making bread:

1. When you're mixing with a spoon and adding flour, the dough suddenly becomes too difficult to pull the spoon around the bowl. This is when you flour your hands and get them in there and messy. Consider it a bonus if someone else is around, and you get to wiggle your doughy fingers in their face saying, "Mmm dough!"


2. When you leave the bread to rise and don't peek for an hour, when you come back, it will have doubled in size. What once fit in the bowl is now overflowing it. So you punch it down, and you can feel the air bubble compressing and collapsing. So relaxing.


3. Obviously, eating the bread.

I based my bread on some generic recipes for honey milk bread, but found that they called for far too much flour. I used six cups measured and mixed in before flouring my hands and throwing in little bits until the texture was right. My recipe is below.


White Honey Milk Bread
Makes 2 loaves, Bake at 375 for 30 minutes

Ingredients:

2 1/2 cups milk, warmed in the microwave for 1:30
2 packets (or 4 1/2 teaspoons) active dry yeast
1/3 cup honey
1/4 cup (or half a stick) unsalted butter, melted
1 teaspoon of salt
6 cups flour, plus up to 2 cups extra for kneading
Oil for greasing

Instructions:

1. Mix the yeast into the warm milk until mostly dissolved in a very large bowl. Then add the honey, butter, and salt and keep mixing until smooth
2. Add the flour, one cup at a time, incorporating it completely into the wet ingredients. When it gets difficult to mix with a spoon, flour your hands and begin mixing with those instead.
3. Continue adding flour a little at a time until the dough is stretchy but not overly sticky. Knead any excess flour from the bowl edges into the dough
4. Grease the top of the dough with a little bit of oil and cover the bowl with plastic wrap and a clean kitchen towel. Place the bowl in a warm, dry spot to rise.
5. After the dough has doubled in size (about an hour) remove the towel and plastic wrap and punch it down.
6. Break the dough into two halves, and place each in a greased loaf pan. Grease the top of each loaf, and cover with plastic wrap and a towel.
7. After the dough has double again (about half an hour) bake at 375 for 30 minutes, or until golden brown and dry on the top.
8. Remove loaves from oven and pan, cool on a cooling rack and place covered  in a cool, dry place until ready to serve.
9. Cut yourself off a slice and spread some honey butter or strawberry preserves. Mmm

Thursday, January 22, 2015

Red Jalapeno Sweet Chili Sauce


The most important ingredient when making anything involving chili peppers is a glass of milk. It doesn't matter how many times I wash my hands after cutting the peppers, I will somehow get pepper burn somewhere: eyes, mouth, nose. The milk doesn't cure it, but man does it cut down on that pepper pain.


Seriously, it defies the laws of physics. This even happens if I'm throwing some white pepper into a stir fry. Either I'm careless or just ridiculously oversensitive to capsacin.

It's totally worth it, though.


Sweet chili sauce is perfect. It's the best condiment in all of existence. It's hard to think of meals it doesn't complement. Have a whole day of sweet chili sauce: mix it in with some scrambled eggs for breakfast. Spread it on a grilled Brie sandwich for lunch. Dip your egg rolls in it for an afternoon snack. Or do what I did, and top your pulled pork tacos for dinner with a sweet chili slaw.


Or eat it with a spoon. Seriously. Just watch out for that bite.

Also, this recipe is super easy to make. The hardest part is when your house starts to smell like gingery peppers and you just want to eat it. Right. Now.

Resist. It will be better after it simmers.


Red Jalapeno Sweet Chili Sauce

Ingredients:

3/4 cup Water
1/2 cup Vinegar blend (mine was half white, half rice)
2 Tbsp Sugar
1 Red jalapeno, seeded and diced into small pieces
1/2 of the seeds from the pepper (more or less to your taste)
1 clove garlic, diced
2 tsp garlic powder
1 tsp onion powder
1 tsp paprika
2 tsp grated ginger
Cornstarch slurry: 1 Tbsp cornstarch mixed into 1 Tbsp cold water

Instructions:

1. Mix all the ingredients, except the cornstarch slurry, together in a medium saucepan and heat over medium heat, stirring until the sugar is completely dissolved
2. Bring the mix to a boil, then lower the heat and let simmer for 20-30 minutes
3. Mix up the cornstarch slurry and add to sauce, mixing until fully incorporated
4. Remove from heat and cool on the counter, then place in the fridge until chilled throughout.


Related Posts Plugin for WordPress, Blogger...